
New Roof NV has more than 25 years of experience offering flashing repair services to commercial and residential property owners in Reno, NV, and the surrounding communities. We are equipped with specialized techniques for flashing repair, making us one of the best in this area. Flashing repair demands extreme precision and attention to detail, and luckily for you, our team of qualified roofers are blessed with both.
Our professional roof flashing repair services in Reno, NV, extends to leaks and damage around chimneys, walls, roof valleys, skylights, vents, and other roof penetrations. Flashing is a thin metallic component so designed as to reflect water away from vulnerable roof transitions. However, lifting, corrosion, failed seals, improper installation, or storm damage can allow moisture to seep into the roofing system. Our team inspects the flashing and surrounding roofing to identify the source of the problem and determine whether repair or replacement is the appropriate solution for your unique flashing problem.
What Is Roof Flashing and Why Is It Important?
Roof flashing is a thin material, usually made of galvanized steel, that is affixed wherever the roof meets a vertical component such as a chimney, wall, valley, roof vents, or skylights. A flashing is primarily built to direct water away from the vulnerable areas of the roof, such that it does not seep through these areas and into the inner components of the roof. Flashing is particularly important because roof intersections and penetrations are natural weak points of water entry.
Common Roof Flashing Problems We Repair
Loose or Lifted Flashing
Flashing may be dislodged from its place due to loose fasteners or by wind uplift. That’s not all, normal wear caused due to age and movement between materials as they expand and contract with Reno’s fluctuating weather may also cause the flashing to fail.
Rusted or Corroded Flashing
Your flashing sits out in the open and takes the worst of the sun, rain, hail, and snow and rusts or corrodes over time. Surface-level rust can simply be brushed away but deeply-rusted, flaking, or pitted flashing is a different story altogether. Water can find its way through the holes in the flashing, which even a fresh coat of sealant may not be able to fix. Fully replacing the corroded or rusted flashing is your answer to having fully-functional metal flashing again.
Cracked or Failed Sealant
Sealant is what keeps the flashing secured to the roof, but often, it gets worn out by exposure to the elements such as the sun, water, hail, snow, and humidity. These elements cause the sealant to peel away or separate around the flashing joints, leading to gaps that can become an easy entryway for water. We inspect the sealant around your flashing for signs of aging and wear, and apply a fresh coat after clearing out the old material. If the flashing is worn out too, sealant alone will not fix it.
Bent or Damaged Flashing
Flashing is tough, but not tough enough to resist the impact of storms and wind-borne debris. A fallen tree limb or foot traffic can cause much the same effect as high winds. Rust alone does not have to necessitate flashing replacement, sometimes a previous patch job or mechanical damage from dropped tools can cause flashing to bend or get creased. When that happens, we simply replace the misshapen or misplaced flashing to make the whole structure as good as new.
Improperly Installed Flashing
Cracked sealants and rusted flashing alone do not have to leave gaps for water to enter. Sometimes, improperly-placed or loose fasteners, incorrectly-placed flashing, gaps left along edges and corners, skipped sealing steps, or ignoring manufacturer instructions can cause much the same problem. Problems like these call for redoing the flashing, not a simple patch job.
Signs Your Roof Flashing Needs Repair
ceiling stains
leaking near a chimney
water around skylights
water near walls
loose or raised metal
corrosion
cracked sealant
missing flashing pieces
recurring leak after previous patch
exposed fasteners
gaps where roof meets wall
new leaks after high winds
Chimney Flashing Repair in Reno
A chimney is one of the trickiest spots on any roof. Water runs down the slope, hits a brick or masonry wall, and looks for any gap it can find. Flashing is what keeps that water moving along the roof instead of into your attic. Good chimney flashing is built from several pieces, and each one handles a different part of the job.
Base / Apron Flashing
The base flashing, often called apron flashing, sits on the downslope side of the chimney, the face that points toward the eave. This is where the most water collects, since everything running down the roof above the chimney gets pushed around it and past it. The apron is a single bent piece of metal. One leg lies flat on the shingles, and the other turns up the face of the chimney. The bottom edge laps over the shingles below it so water drops onto the roof surface and keeps going. Because it takes the heaviest flow, any mistakes here tend to show up as leaks quickly.
Step Flashing
Along the sides of the chimney, the roof slopes away from the masonry in a staircase pattern, so a flat strip of metal will not work. Step flashing solves this with small, individual L-shaped pieces. One piece goes in with each course of shingles. The bottom leg lies under the shingle, and the vertical leg runs up the side of the chimney. Each piece overlaps the one below it, a bit like fish scales, so water that gets behind a shingle is sent down and out instead of in. Since the pieces are separate, the roof can shift and settle with the seasons without tearing the flashing apart.
Counter Flashing
Step flashing and apron flashing handle the roof side of the joint, but the top edge of that metal still has to be covered. That is the job of counter flashing. It is set into the masonry, usually in a cut mortar joint called a reglet, and bent down so it hangs over the upper edges of the step flashing. Water running down the chimney wall lands on the counter flashing and drops onto the step flashing below, never behind it. Because it is anchored in the brick and not stuck on the surface, it holds up far better over time.
Why You Need Both
A properly built chimney uses step flashing and counter flashing together. Some quick repairs rely on one long strip of metal, or on a thick bead of roofing cement or caulk along the joint. These can look fine for a season or two, but sealant dries out, cracks, and pulls away from brick as the temperature swings. A single rigid piece can't move with the roof and the chimney, which move at different rates. The two-part system works because the pieces are layered and are allowed to flex. Sealant has a place as a backup, but it should never be the thing keeping water out.
Why Chimney Flashing Leaks
Chimney flashing fails for a handful of reasons, and most leaks involve more than one of them working together over several years.
Failed sealant.Caulk and roofing cement are often used as a quick fix at the chimney joint. They dry out, shrink, and crack under sun and weather, and once a gap opens, water gets straight in.
Cracked mortar joints.Counter flashing is usually set into the mortar. When those joints crumble or split, the metal loses its anchor and water can run behind it.
Corrosion.Metal that has rusted or pitted through can no longer shed water, and small holes often go unnoticed until a ceiling stain shows up.
Loose flashing.Wind, ice, and years of expansion and contraction can pull fasteners out and lift edges away from the masonry or the shingles.
Incorrect installation.A single long strip of metal where step flashing belongs, or counter flashing nailed on the surface instead of set into the brick, may hold for a while and then fail early.
Movement between masonry and roofing.A brick chimney and a wood-framed roof do not respond to temperature the same way. They expand, contract, and settle at different rates, and over time that tug of war can gradually open the joints that were tight when the work was done.
Aging materials.Even good flashing has a lifespan. Metal wears down, sealants break apart, and the shingles around the chimney get brittle.
Step Flashing Repair at Roof-to-Wall Areas
Step flashing is used anywhere a sloped roof runs into a vertical wall. That includes chimney sides, dormer cheeks, sidewalls where a lower roof meets the side of a house, and any other place where a vertical surface rises out of the shingles.
The idea behind it is simple. Each small piece of metal is bent into an L shape and laid with one shingle course. The bottom leg sits on top of the shingle below it, and the upright leg runs up the wall. The next shingle goes over the flat leg, then the next piece of flashing goes over that shingle, and so on up the roof. Every piece overlaps the course beneath it, so any water that gets past the edge of a shingle lands on metal and is directed back onto the roof surface instead of behind the roofing.
Repair here usually means finding where that pattern has broken down. Pieces may be bent, rusted, missing, or buried under a continuous strip of sealant. Fixing it properly often means lifting the shingles along the wall, replacing damaged pieces, and weaving new ones in course. Smearing more sealant over the problem rarely works. This is one of the clearest differences between a real flashing repair and a generic patch job.
Counter Flashing Repair
Counter flashing is the second layer that sits over step flashing and base flashing. It is found wherever roofing meets masonry or a wall surface that needs a protected top edge, with chimneys being the most common example.
Its purpose is to cover the upper edge of the flashing below it. Step and apron flashing run up the wall, but their top edges would be exposed if nothing covered them. Counter flashing hangs down over those edges, usually tucked into a cut mortar joint or a groove in the wall, so water running down the face of the chimney drops onto the counter flashing and then onto the lower metal, never behind it.
When counter flashing fails, it can come loose, rust, or lose its seal at the mortar. Then water slips behind the whole flashing system, and the lower pieces, which may look perfectly fine, can't stop it. Repairs often include re-cutting the mortar joint, setting new metal, and repointing so it stays put. Current chimney guidance treats counter flashing as an important second line of defense over the step flashing, not an optional extra.
Roof Valley Flashing Repair
A valley is where two roof slopes meet in a V, and it carries a lot of water. Everything coming off both slopes funnels down that one channel, so the flow is faster and heavier than almost anywhere else on the roof.
Problems that show up in valleys include:
- Corrosion in the metal, especially along the center seam
- Punctures from fallen branches, foot traffic, or careless nailing
- Loose shingles along the edges that let water slip underneath
- Failed seams where sections of metal overlap
- Damaged or bent valley metal
- Leaves, needles, and other debris that pile up and hold moisture against the roof
A valley leak is not always the metal's fault. Water can be getting in because of the shingles that border the valley, or because debris has forced it sideways. A proper inspection looks at the flashing and the surrounding roofing together before deciding what needs repair or replacement.
Skylight Flashing Repair
Skylights are a common spot for leaks, and flashing is a frequent culprit, but it is not the only one. Things worth checking include:
- A flashing kit that has failed or was never a good match for the skylight
- Loose or lifted metal around the frame
- Damaged shingles next to the unit
- Seals that have dried out, cracked, or pulled away
- Installation mistakes, like poorly lapped pieces or flashing that was never integrated with the shingles
It is worth being careful here. A leak near a skylight does not automatically mean the flashing is to blame. The skylight itself can be responsible, through a cracked or failed glazing seal, a damaged frame, or condensation that mimics a leak. A good repair starts with figuring out where the water is really coming from, so the fix goes to the right place.
Roof Vent and Pipe Flashing Repair
Small roof penetrations get overlooked, but they leak more often than people expect. Plumbing vents, exhaust vents, and other pipes all pass through the roof, and each one depends on a bit of flashing and a seal to keep water out.
When inspecting them, the main things to look at are:
- Plumbing vent boots, where the rubber or neoprene ring around the pipe often cracks and splits
- Roof vent flashing around exhaust and ventilation openings
- Rubber collars that have hardened, shrunk, or pulled away from the pipe
- Metal flanges that are bent, rusted, or sitting loose
- Surrounding shingles that are lifted, cracked, or missing
Rubber and sealant tend to give out long before the roof itself does. Once a collar splits or a flange loosens, water can run down the pipe and into the attic or ceiling below. In many cases the repair is as simple as replacing a worn boot or resetting the flange, but it needs to be done properly, with the new piece worked correctly into the shingle courses around it.
Roof Flashing Problems After Reno Wind and Winter Weather
Reno’s weather affects roofs in ways that are easy to underestimate. Seasonal winds, strong high-altitude sun, winter storms, and big swings in temperature all put steady demands on a roof. Flashing sits at the joints and edges where the roof is already most exposed, so it often shows the strain first. Properly installed flashing is built to handle this climate, but the weather does test every detail, and weak spots tend to come to light when conditions get rough.
Wind
Reno gets gusty stretches, especially in spring and fall, and wind works on a roof from several directions at once. It pushes against raised edges, pulls at anything that isn’t fully secured, and finds the small gaps that calm weather never touches. Where flashing was already a little loose, wind can lift it further. Edges that were held by a thin margin can loosen, and shingles, tiles, or other materials near the flashing can shift out of place. Once a piece is displaced, the area underneath is exposed to the next rain or snow. Flashing that is fastened correctly and sealed well is a different story. It generally stays put through a windy season, and the problems we see after a blow usually trace back to something that was already marginal.
Snow and Moisture
Winter storms bring snow, ice, and long periods of dampness. Water that sits on a roof for days has plenty of time to work into any weakness it can find. That is why snow and moisture tend to expose the vulnerable transitions: the chimney base, the wall lines, valleys, skylight edges, and pipe penetrations. If flashing has a small gap, a cracked seal, or a rusted spot that never leaked in dry weather, melting snow can bring it to light. Moisture doesn’t create these flaws by itself in most cases. It reveals the ones that were already there, which is why a leak that shows up after a storm is often a long-standing flashing problem that finally had enough water to cause trouble.
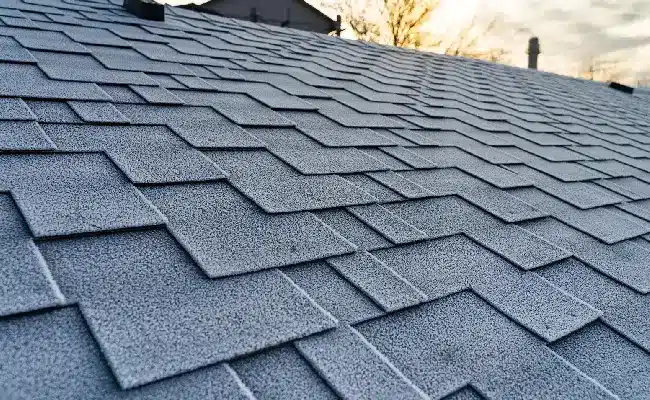
Freeze-Thaw Temperature Changes
Reno can swing from freezing nights to bright, mild afternoons, sometimes within a single day. Every time that happens, roofing materials expand and contract, and they don’t all move at the same rate. Metal, masonry, wood, and sealant each respond differently, so over many cycles the joints between them can gradually shift. That movement can show up around:
- Masonry joints, where mortar can crack and loosen its grip on counter flashing
- Sealants, which stiffen, shrink, and pull away from the surfaces they were meant to bond to
- Fasteners, which can work loose or back out slowly over time
- Flashing interfaces, where metal meets shingles, brick, or a wall and a small gap can open
Water that gets into those gaps and freezes can widen them further. None of this means freeze-thaw cycles automatically ruin good flashing. Well-installed flashing is designed with overlap and flexibility so it can handle normal movement. The trouble starts when materials are aging, sealant is carrying a job it shouldn’t, or the original work left little room for the roof to move. Catching those small changes early is usually far easier than repairing the water damage that follows.
Flashing Repair vs. Flashing Replacement
| Repair May Be Appropriate | Replacement May Be Better |
|---|---|
| Minor seal deterioration | Severe corrosion |
| Small isolated issue | Metal is cracked or perforated |
| Flashing remains properly positioned | Flashing is badly bent or displaced |
| Localized fastener problem | Installation detail is fundamentally incorrect |
| Surrounding roof is sound | Surrounding roofing must be removed for correction |
Our Roof Flashing Inspection and Repair Process
Step 1: Identify the Leak Symptoms
Our very first step begins with asking questions. Where are the stains? When does it leak, and does it line up with wind or snow? Has anyone patched it before? Your answers tell us where to start.
Step 2: Inspect the Flashing Location
Then we get up to the flashing and look it over closely. We check the metal, how the pieces lap, whether the fasteners are tight, any sealant, mortar joints if there are any, and the roofing nearby.
Step 3: Inspect Adjacent Roofing
Flashing trouble rarely shows up alone, so we look around it too. That means the shingles or tiles close by, the underlayment if we can get to it, any hint of bad decking, and nearby penetrations.
Step 4: Trace the Likely Water Entry Point
Water doesn't always drop straight down. The stain inside might be well away from the actual entry point, so we work our way back up the roof to find the likely source instead of just guessing.
Step 5: Document Findings
Photos get taken along the way. One shows where on the roof the problem is, another shows the failed detail close up, and a few show the roofing around it, so you can see what we see.
Step 6: Recommend Repair or Replacement
When we know what's failing and why, we'll tell you if it needs a repair or a full replacement. We explain our reasoning plainly, so the recommendation fits the problem you actually have, not a bigger job.
Step 7: Complete and Verify the Repair
Once you approve, we make the repair, replacing or resetting damaged flashing and fastening it securely into the roofing around it. Then we look over the result and walk you through what we did.
Why Choose New Roof NV for Roof Flashing Repair?
Partnering with New Roof NV gets you a Reno roofing company people trust, backed by real experience. We have worked in this area for over 25 years, and that time has taught us to notice small problems, care about the work, and do it right every time. We only use top-notch materials, since they help your roof last longer and keep working the way it’s supposed to. Every job is different, so we tailor our work instead of pushing one standard fix. A few more reasons to choose us:
- 25+ Years Of Roofing Experience
- Locally Owned
- Reno And Northern Nevada Service Areas Covered
- Residential And Commercial Roofing Experience
- Asphalt, Tile, And Metal Roofing Experience
- Photo-Documented Inspection Findings
- Nevada Contractor License #0086415
Frequently Asked Questions
Is Caulk Enough to Fix Roof Flashing?
Sometimes sealant is part of a flashing system, but simply smearing caulk or roofing cement over failed flashing is not always a durable repair. If the metal is badly corroded, improperly installed, rusted, separated, or structurally damaged, then instead of the sealant, the flashing may need repair or replacement. Heavy surface patching can hide instead of correctly solving a flashing problem.
Can Bad Flashing Cause a Roof Leak?
Yes, it can. Water can enter behind loose, damaged, improperly-installed or overlapped, or deteriorating flashing. The visible interior stain may not appear directly beneath the failed flashing because water can travel through the roof assembly, following the path of least resistance, before becoming visible.
Can Roof Flashing Be Repaired Without Replacing the Roof?
Often, yes, when the flashing problem is localized and the surrounding roofing remains serviceable. Replacement may become more extensive when the flashing is embedded beneath damaged roofing, the underlayment has failed, the decking is damaged, and the surrounding tiles or shingles are deteriorated. A flashing leak does not automatically mandate a new roof.
How Much Does Roof Flashing Repair Cost in Reno?
Flashing repair in Reno, NV, boils down to a number of factors such as the flashing type along the chimney, vent, or wall. The roof’s pitch, accessibility, extent of corrosion, necessary removal of the surrounding material, shingle/tile replacement, underlayment damage, decking damage, or masonry work wherever applicable. A small vent flashing repair requires a very different scope from replacing step and counter flashing around a chimney, so the roof should be inspected before an accurate repair estimate can be prepared.
How Long Does Roof Flashing Repair Take?
Timing for flashing repair depends on the location of the flashing, roof access, extent of the damage, the roofing material, masonry involvement, adjacent shingle/tile work needed to go along with the flashing, and hidden water damage.
What Happens If Damaged Flashing Is Ignored?
Potential consequences of damaged flashing includes recurring water intrusion, damaged underlayment, wet insulation, roof-deck deterioration, drywall staining, and scope for more repair.